Mining and Dwarves Ability Ranking
Eight skills, honest grades: hover Q, dump W on the orb, treat lasers as clutter.
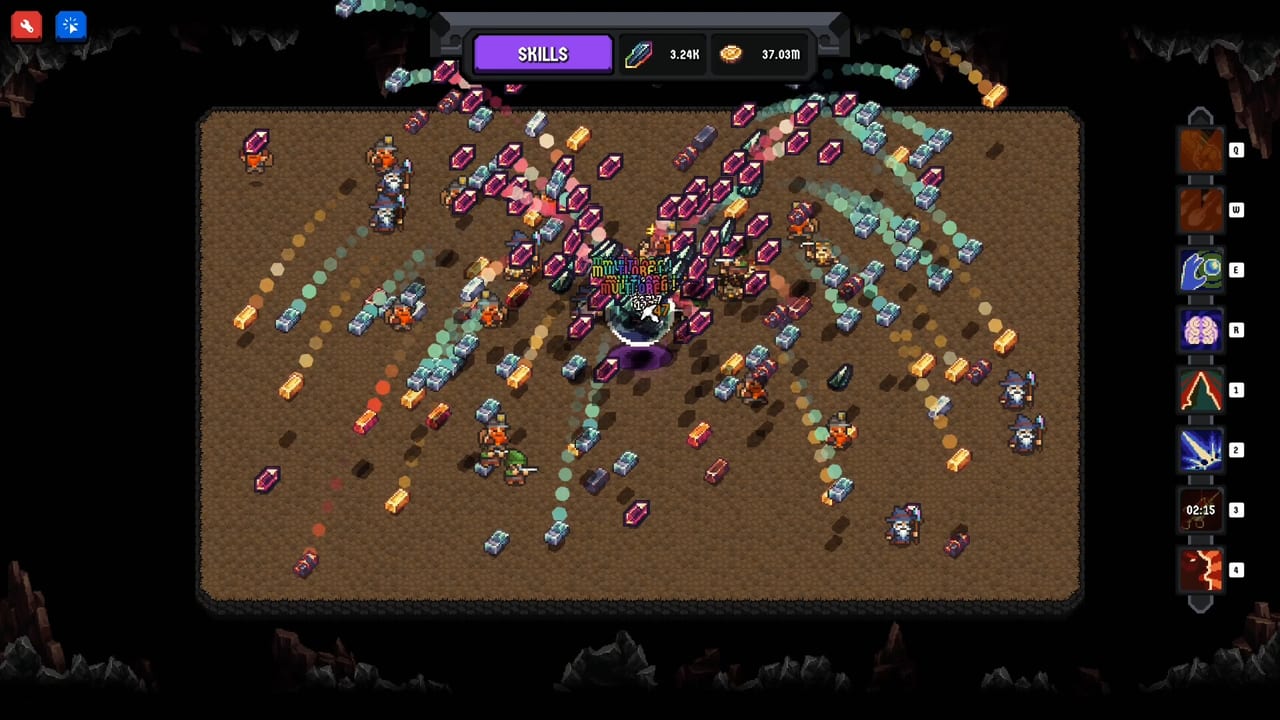
This ranking covers all eight player abilities in the full Mining and Dwarves build. It is launch-week and subjective. The June demo only unlocked four of these skills; retail sold eight. Letter grades measure deposit-bar speed and wasted motion, not how loud the VFX is. Kit text without grades lives on the abilities guide. Idle versus hovered play is a separate argument on idle versus active.
Pies that spawn in the mine temporarily enhance skills when clicked. They are a multiplier on whatever you already bound, not a ninth hotbar slot, so they do not get a letter of their own.
Super Auto Miner — S
Q is a hover autoclick. Your cursor clicks rocks several times per second for a short window. You still have to aim. It is the best active tool because Q multiplies the shatter rate you were already doing.
Early cooldowns are long relative to the duration. That is annoying and it does not knock Q out of S. Unlock it, sit the cursor on a dense cluster, and fire it whenever it is up. Cooldown nodes help more than tiny duration bumps.
Multi Ore — S, especially on the orb
W is a chance for extra ore when you mine. On ordinary rocks it is a nice bump. On the special orb that spawns after the deposit fills, it is the reason the bar was worth filling. The orb is a short, fat payout window. Multi Ore turns that window into the burst that buys the next tree cluster.
Use W on the orb first, rocks second. If both Q and W are up when the orb spawns, hover the orb and chain them. That chain is the active skill expression in this game. Everything else on the bar is either enabling that chain or decorating it.
Refresher — A
Refresher exists to put Q and W back in your hand. Combo enable is the whole rank. A cooldown cut that lets you double-dip the same orb, or fire Super Auto Miner twice on a packed floor, is worth more than a new laser. If you never press Q or W, Refresher is a dead node. If you play active, it is the difference between one orb pop and two.
Buy it after Super Auto Miner and Multi Ore are actually on the bar.
Ore Vacuum — A
Ore Vacuum is haul help from the player hotbar. Collectors already carry to the sink; vacuum is for the carpet you created by clicking faster than the crew can walk. It is quality of life that still moves the deposit bar, which is why it sits in A instead of the clutter pile.
Vacuum does not replace Collector hires. If you are vacuuming every ten seconds because you refused to buy carry, you spent an ability charge on a staffing problem. Use it when a shatter burst outruns the crew, then go back to hovering Q.
Strike the Earth — B
Strike the Earth buffs workers and can roll extra gem value. That is a real multiplier, just not a burst you time on the orb. It plays more like a button you press when the floor is already staffed. B is honest: useful, not the reason you look at the hotbar.
Hire first, strike second.
Enhancer — B
Enhancer is a skill-on-skills node, in the same family as pies. In practice it scales whatever you already fire, which means it is only as good as Q, W, and Refresher. Without those, Enhancer is a multiplier on nothing much. With them, it is a fine mid-game buy. It is not S just because it sits near the end of the tree.
Big Rock — C
Big Rock is the first of the two clutter grades. Larger rocks can mean juicier shatters and they can mean a busier, harder-to-read floor with more health in the way of the next drop. Launch-week play and reviews already flag this kind of node as spectacle. If your screen is easier to parse without it, skip it. If you like the juice and your haul can keep up, buy it late and do not pretend it is a damage cooldown.
Reactive Rocks — C
Reactive Rocks fire lasers in extra directions. It is the poster child for mixed reviews: cozy juice versus linear clutter. The lasers look expensive. They also hide ore, hide dwarves, and hide the orb you were supposed to W. C means you can take it for fun after the loop is solved. It does not mean you should spend early shards to make the mine louder.
How to spend around these grades
Unlock Super Auto Miner, then Multi Ore, then the cooldown line that includes Refresher. Vacuum when haul lags. Leave Strike, Enhancer, Big Rock, and Reactive Rocks until the mixed crew is online. That order matches skill paths and the more mechanical abilities guide. Active players should live on Q, W, and pies. Idle players should still unlock Q for the sessions they are at the desk, then let miners and collectors work; see idle versus active before you assume the hotbar is optional.
Frequently Asked Questions
Quick answers to the most common questions.
What is the best ability?
Super Auto Miner for rocks and Multi Ore for the orb. Both are S. Bind Q and W before you chase lasers. Kit details are on the abilities guide.
Why is Multi Ore so strong on the orb?
The orb is a short payout window after the deposit fills. Extra ore on that window is a burst; extra ore on a normal rock is a trickle.
Are Big Rock and Reactive Rocks actually bad?
They are C: late, optional, and easy to overvalue because they fill the screen. Mixed reviews already call that clutter. Buy them for juice after speed and cooldown.
What do pies do?
Pies spawn in the mine and enhance skills for a short time when clicked. They buff the hotbar you already have; they are not a separate ranked ability.
Does Super Auto Miner work if I am idle?
No. Q autoclicks under the cursor. If you are not hovering a cluster, it does nothing. Idle income is dwarf labour, covered in idle versus active.
When should I buy Refresher?
After Q and W are unlocked and you are actually pressing them. Then follow skill paths for the cooldown cluster.