Miners and Collectors in Mining and Dwarves
Damage versus haul: mix the two starter roles, then spend shards on carry limit and worker speed.
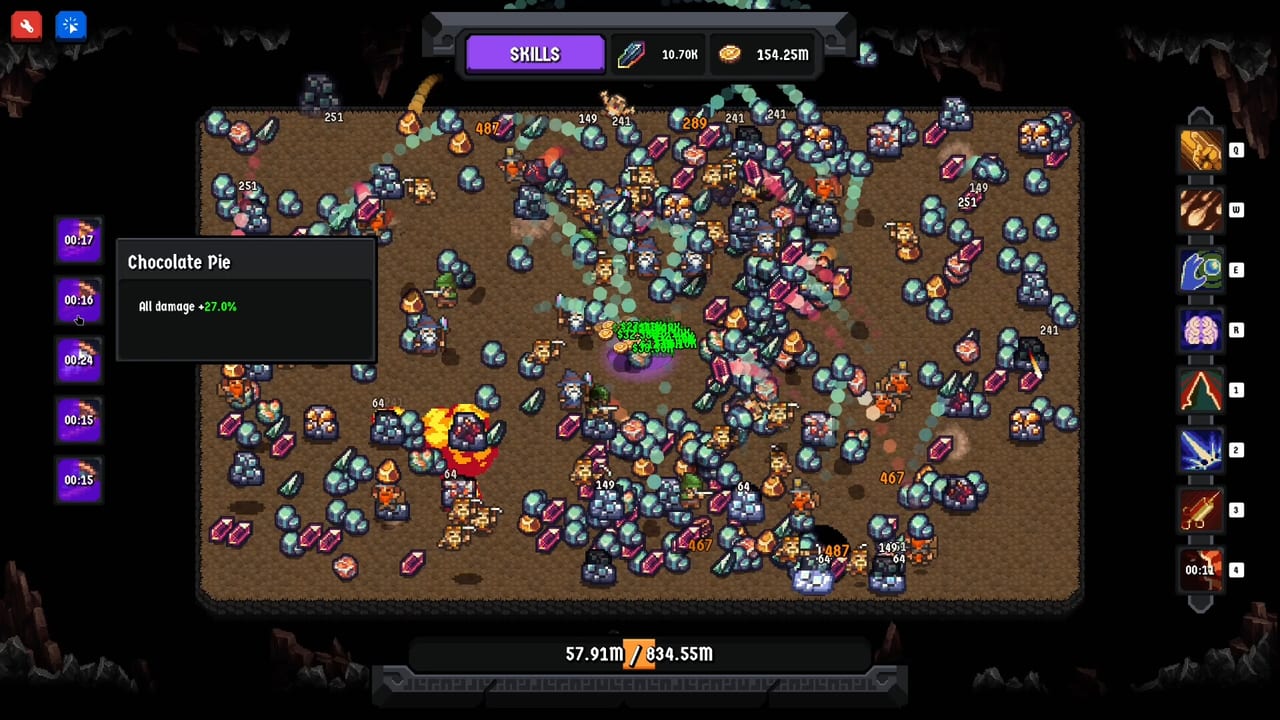
Every Mining and Dwarves save, demo or full, starts on the same two jobs. Miners hit rocks. Collectors carry shattered ore into the central deposit. The rest of the roster — including the Demolition Dwarf and the two unnamed full-game specialists — sits behind this split. If the opening mix is wrong, later hires cannot fix a floor covered in drops nobody is hauling.
This page is the practical guide for that first crew. For the later three types, use specialist dwarves. For a ranked view after you have seen both jobs in motion, use the dwarf tier list. First-hour spend order is in getting started and the upgrade-priority tool.
How the loop actually splits
You click (or Auto Click) rocks until they break. Broken rocks leave pickups on the floor. Those pickups are not gold yet. A collector has to walk them into the central deposit — the black-hole sink in the middle of the mine. Depositing fills a bar, pays gold, and eventually spawns a special orb. Mining that orb is how void shards show up for the skill tree.
Miners shorten the time until a rock dies. They do not put ore in the sink. Collectors shorten the time until the sink fills. They do not chip rock health. Player clicks and Super Auto Miner also deal damage, so a human who is actively hovering can temporarily stand in for miners. Nobody stands in for collectors except other collectors, vacuum-style upgrades, and your own cursor if you still click pickups — which most people stop doing once a crew exists.
A floor with four miners and zero collectors dumps wealth on the ground. A floor with four collectors and zero miners waits on rocks that never break unless you click them yourself.
Why a mix beats stacking one role early
Early skill nodes often sell dwarves in small packs: recruit a miner, recruit a collector, recruit two of one job. New players stack the role that looks like “more mining” and skip haul. The sink then lags every shatter, especially once Multi-ore or a lucky orb dump paints the floor.
A mixed pair is the first automation spike because each rock cycle has two clocks: time-to-kill on the current rocks, and time-to-deposit on the drops those rocks leave. The slower clock is your real income. Stacking the fast clock makes the slow clock worse. After you have at least one of each, watch the floor for a full rock wave and a full orb wave. If rocks sit at full health while collectors wander, buy miner damage or another miner. If drops sit untouched while miners swing at air, buy a collector, carry limit, or worker speed.
You can stack later. Once carry limit is comfortable and walk time is short, extra miners convert idle time into extra shattered rocks. Extra collectors matter when abilities dump huge pickup bursts. The mistake is stacking before you have seen which clock is losing.
Carry limit versus damage
Carry limit is how much a collector can hold before a trip to the sink. Damage is how fast miners (and you) pop rocks. They fight for the same gold and shard budget on the tree.
- Raise damage when rocks feel spongy, when you wait on the last chip before a shatter, or when the orb takes too long even with Super Auto Miner on it.
- Raise carry limit when collectors make frequent tiny trips, when the floor stays glittery after a shatter, or when orb dumps overflow into corners.
Damage without carry limit just creates larger messes. Carry limit without damage means collectors stroll past healthy rocks. Treat them as a pair, the same way you treat miner count and collector count. Player mining damage helps the active style — you are an extra miner — and does nothing for haul. Auto Click AFK wants dwarf damage plus carry limit more than personal pick power.
Worker speed and hire order
Worker speed is walk time for both jobs. It is easy to skip because it does not print a bigger damage number, and it is often the cheapest way to make an existing mix feel twice as busy. Buy speed when dwarves take scenic routes, when the deposit idles, or when a new hire barely moves income. Specialists do not erase a slow basic crew.
Practical order: one collector as soon as the node is cheap, one miner if your clicks are not already deleting rocks, then worker speed and carry limit before a third copy of either job. Rebalance after the first orb cycles — those dumps are larger than rock waves — and only then open specialist dwarves. Use getting started if nobody is hired yet, and the upgrade-priority tool when every node looks equally shiny.
Failure modes
All miners starve the sink. All collectors make you the only miner. Tiny carry limit turns two collectors into two slow trips. A specialist will not rescue a mix that cannot haul. Watch one sink bar with Auto Click on and abilities off; if that minute collapses, fund miners, collectors, speed, or carry before anything else. On the demo, Miner and Collector are the whole roster. The dwarf tier list can rank them after both jobs actually work.
Frequently Asked Questions
Quick answers to the most common questions.
Do I need collectors if I click pickups myself?
Only for the first minutes. Once rocks shatter in bursts, manual pickup does not keep the sink full. Hire at least one collector before you stack miners.
Can Super Auto Miner replace dwarf miners?
It can cover damage while you hover, not while you AFK. Miners keep swinging when the cursor is elsewhere. Collectors still have to haul whatever you break.
What should I buy first, carry limit or another dwarf?
If collectors already exist and they make tiny trips, buy carry limit and worker speed. If you have zero collectors, hire one. See the upgrade-priority tool for the rest of the tree.
Does the demo include both of these roles?
Yes. The demo (Steam 4070070, 10 June 2026) has Miner and Collector only — two of the five full-game types. Specialists are launch-tree content.
When do I start stacking one role?
After a mixed pair is hired and the floor clears between waves. Extra miners help idle damage; extra collectors help orb dumps. Do not stack in the first hire.
Where do specialists fit into this mix?
After the sink is fed. Read specialist dwarves and getting started before you skip carry limit for a late node.